Download Firmware Samsung N7100 Indonesia Embassy
Download • • • • • • - Samsung device drivers () Flashing guide: 1. Download and extract a zip file containing your desired firmware. Open Odin Tool.
Boot your device in the 'Download Mode': Press Volume Down, Power and Home buttons at same time for 5-8 seconds until download mode is active. Connect your device to PC via the USB cable while in download mode. Next, check the 'Auto Reboot' and 'F. Reset Time' options in Odin Tool. Hit the AP/PDA button then browse and select a tar.md5 file from the extracted folder.
Finally press the start button to begin flashing the firmware update on your device. We are sure that the recent rumors about a single rear-facing camera for Samsung’s S9 have definitely made you upset. We hoped that it was some kind of unreliable information, but now it has turned to be a reality due to the fresh news that has leaked online.
The S9 is really expected to have a single camera module on the back panel, while its Plus-sized version will come with a desired dual rear-facing unit. But there is also some good news: both handsets will have a fingerprint scanner located beneath the camera for more convenient use.
Who are on 4.1.1 firmware, are requested to update their device to latest 4.1.2 (2013 released) as soon as possible, older ROMs have SDS (sudden death syndrome) bug and can brick device spontaneously. Latest ROMs are believed to be patched for this bug with kernel and recovery. ROM mentioned here are pure stock ROMs and it is same as you recieve from kies, as well flashing these ROMs doesn't raise flash counter. Some of ROM also having prerooted version and those are same as stock ROM but root files are pushed in ROM, so you won't need to have root it.
Prerooted ROMs mentioned here are also won't raise flash counter. If you flash prerooted ROM and later want to unroot, simply open SuperSu from application drawer - setting - unroot. Stock ROMs for N7100 MUST READ IF YOU FLASHING XXDMF2/ME6 OR later ROM released June13 onwards. Ignore re-pertition,PIT, phone and CSC tab selected in this image 5.
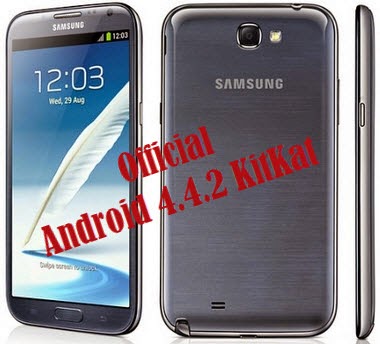
Pengunjung dapat mem-bookmark halaman ini agar kedepannya tidak kesulitan lagi untuk men-download firmware samsung android. GT-N7100: 4.4.2: Indonesia - XSE: Download. Best western plus new caney inn suites new caney united states of america comfort inn north polaris. Embassy suites richmond the commerce center richmond united states of america carillon beach resort inn. Retro Uniform Stripe Leather Wallet Case For Samsung N7100 reviews p88290 test phone skyartec f.

Disconnect the device from the Data cable. Once the device boots up, you can check the version of the binary file or name by pressing the following code in sequence; *#1234# You can perform full reset by pressing the following code in sequence; *2767*3855# Flashing firmware with Mobile odin to keep root intact and flash counter untouched - Flashing with heimdall - -(thanks to as i9000) First thing I do recommend just after flashing ROM -Register to samsung A/C and enable Remote control is detail guide. To ROOT 4.3 Read This post is for Rooting 4.1.* only. If you are going to Root your device, after successful rooting first thing to do is make EFS backup(link to tool for EFS backup included in guide).
Dear friends I can give you simple two steps to root a device, but i won't. I wish you should have all the knowledge about different methods of rooting and pros and cons of each methods available. This may cause this guide longer, bit difficult but ultimately it will never turn down. Read again 2-3 times and still you have any confusion, feel free to post any query you are having. Good luck and Happy Rooting! Now proceed to root Map for this post A.How to root N7100 Advantages and disadvantages of each method of root.
Method 1:Root with stock Recovery Method 2: Root with CWM recovery Update 15.09.13 - - Though I recommend to read this post for knowledge base. Method 3: Root with simple APK B.EFS Backup C.Unroot N7100 ----------------------------------------------------------------------------- A.How to Root N7100 Big Thanx to Chainfire and Chenglu for great work. Select your choice from one of these 1.
Root with Stock Recovery - It will give full root access but have stock recovery. You can set your flash counter '0' and so ready to claim warranty.
If you want device full stock + root this is choice for you. Root + Advanced CWM - This will give Root access as well advanced CWM - Here you can reset counter, but once reboot to recovery, it will raise flash counter, Find option to reset counter on every boot (only ).
3.Root with ExynosAbuse apk - simply install apk to gain root access. (wont work on latest 4.1.2 ROM, Jan 2013/LL7 and later). Quote: So which one I should select? OR Which one is better? All Methods are given by elite developer and all are good, but having its cons and pros.
Method 1: Disadvantage: Here you will get full root access, but here recovery will remain stock, so you won't have option to flash zip files (still you can flash zip with Mobile Odin), but you won't have any option for Nandroid backup/Restore. Advantage: You have to reset flash counter once only, then whenever you need to reset to unroot/ready to claim warranty, just you need to go to superSU - setting - unroot. So If you are Flash counter conscious and really don't have need for nandroid backup, This one is for You.
Method 2: Disadvantage: Note2 having auto check sum boot loader and it will check for custom things on every boot. So rooting with this method your counter will remain 1, even if you have reset it with triangle away. Though one possibility is there to reset counter, you have to use market version of Triangle Away with option 'Reset counter on every boot'. But keep in mind this option only available if your kernel support this, stock kernel won't support it. Again before claiming warranty you need to flash stock recovery. Advantage: You will have feature rich recovery like flashing zip from recovery and Nandroid backup/Restore.
So If you are not much worrying about flash counter or warranty and you really need Nandroid backup, This one is for you. Method 3: - (wont work on latest 4.1.2 ROM, Jan 2013/LL7 and later) Advantage:Biggest thing you can disable exploit and make device safer. Easiest, No PC Needed.
Simply install apk to root device, No flashing/Resetting counter needed. Disadvantage:Camera issue on some FW, but reversible by enabling exploit in one click. IF YOU STILL HAVE ISSUE IN FLASHING CWM (Stock recovery overwrites CWM) - First root with option 1 and then follow Step 2: Now reboot to recovery and flash superSu and busy box file from recovery, which you have copied to Sd card and reboot system Done!
You should have SuperSU application in drawer. Read post#3 regarding how to reset counter. 3.Root with apk No counter reset needs, Easiest - Credit goes to Chainfire, alephzain (not works on latest ROM, Jan 2013/LL7 and later) 1.Download latest from chainfire's 2.Install application as routine apk installation and open it. 3.Open Exynos Abuse application from App drawer 4.Select Root device (see image) 5.It will ask SuperSU permission, Grant it See image) 6.Now your device is rooted, for security purpose you can disable Exploit.(see image) Note: This may break camera, but unchecking disable exploit make it working again 7.Open SuperSU from app drawer and update binary (see image) How to Unroot and make status Normal Open Exynos Abuse app, uncheck disable explot and select Unroot device (see image) Restart device and wait for 10 min. And then you can check status. Reseting Counter Above method will raise flash counter and you will need to reset counter to reclaim warranty, Read next post for it (post#3) B.ESF Backup - First thing i do recommend after rooting.
Also read Why so? EFS folder contains some important and some basic info related to our device identity like Wi-Fi address, Bluetooth MAC address and the very main IMEI address (nv_data.bin). Now if this EFS partition accidently corrupted then your phone’s IMEI no. Will erased and you can not make voice call further. This kind of damage is often not accepted by the service center of your respected handset’s company. Here your backup can only be savior for you. C.How to Unroot: - This is commonly needed before sending it to service station and reclaim warranty.
1.As discussed in post #3 if you have any custom recovery/Kernel first you need to replace it with stock one. Quote: From CF - When you run TriangleAway, if your device and firmware are supported, it will show you the detected state of the binary (custom or official) and flash counter value, and the option to Reset flash counter. Please confirm that the information shown is correct before resetting the values. On a number of devices, TriangleAway can work, but your firmware may not be supported directly. In that case, the app will tell you it needs to reboot into a special boot mode, which will be happen if you select Reset flash counter. The device will reboot into a special mode which will allow you to review the current status and reset the binary and flash counter values (or abort and do nothing.) using Triangle Away may unmount your SD card.
Reboot or manually remount it from Android settings. By Get to support CF Steps to reset counter -Download Triangle away and install -Open Triangle away from appl drawer, grant SU permission -Depends on your recovery/kernel, it may ask to download add on about 7.4MB file, dwnload it. -After downloading select reset counter from application menu -This will reboot device in special recovery, and you will see some colored text menu with big yellow, with round circle exclamation mark. -Read available option, confirm your flash counter showing on this page and select appropriate menu(vol up) to reset counter. -Your device will reboot and you will have counter '0' In case if you are using CWM it may raise again on reboot, read below. NoteII having new bootloader with auto checksum of recovery, so If you are using custom recovery flash counter may raise again on rebooting to recovery So if you are using stock recovery, reseting count to '0' with triangle away is enough.
In case you are using custom recovery, even after reseting counter again it will raise to 1 if you reboot device to recovery. For this you have to use option 'Reset at every boot' in triangle away. This option is available on Play version, and only you can see if you have custpm recovery and your kernel support it. ( reported to support this.) Common question about reseting counter I have reset counter but system status still 'custom' You should have stock recovery (Method A in post#2) If you already have stock recovery(CF Auto root) then reset counter first then wipe cache + wipe data(factory reset) + re wipe cache You should now have system status 'official' Edit: Here is some trick to change status without wiping data I have rest counter but after reboot again it goes to 1 This happen if you have rooted with CWM/TWRP recovery(method 2 in post#2) This is neither error of recovery nor triangle away.
This happens due to new bootloader which have auto checksum for recovery, when you reboot to custom recovery count will raise. To prevent this you need to have play version of Triangle away, and you should check (enable) 'Auto reset at boot'. Again this feature depends on kernel/recovery is supported or not, reported to support this.
- Requires to flash ROM/Kernel/Modem.Using this to flash custom stuff will raise flash counter. 2.- here is Requires to connect your device to PC 3. - Unzip tools to extract files 4. - Not for normal flashing, and shud be use under expert advise only. (supports resume download) 6.
- To download ROM which is currently available on Kies 7.Stock Kernels - 8. - Flash with PC odin for PDA - For expert user only with exynose bug fixed - flash with PC odin for PDA - with flashing this exynseabuse exploit won't work. + + of Galaxy Note2. - If you forget your pasword of screen, this can be saver for you, pro version also available. Read on play store for detail 11.- Very very important tool, If your device is rooted, first thing you need to do is EFS backup. 16.- Utility to reset counter and remove exclamation mark. - Wireless transferring contacts/SMS (via Bluetooth) from your old device to Note.
18.- Simple SMS backup utility, useful before wiping data. 20.- Remove bloatware,backup application and more 21. - Useful to move data to Ext SD card, this helps in making free space on internal memory, as well it help to keep data on factory reset (Note 2 erases data on internal memory while factory reset.) If you bind such folder to Ext SD card then you won't need to backup those data. - This is small window tool for XP machine, you can get support for exfat on XP. Install 32/64 bit according your OS.
23.: if you are pissed off from carrier popup msgs after each call and data connection, here you can block it. 24 Though EFS backup is best to have, but unfortunately you don't have, then worth to try with this. 25.: This application will allow you to enable all those hidden languages which may be blocked by carriers 26. - when you are unable to connect to network and missing correct APN setting, this may helpful to you. -It will make the Email app ignore Exchange-pushed policy on your device, including things like mandatory pin lock (a.k.a. Keyguard), minimum password length, encryption, etc.
Flash firmware using Mobile odin to keep root intact & counter untouched. Acronis True Image 2009 Isometric Exercises. If you have device already rooted, you can use Mobile Odin to flash stock firmware to keep Root intact, as well flash counter will also remain untouched. Here is example to flash leaked firmware LJ2 4.1.2 1.Download & extract ROM file and Copy to SD card. 2.Install When you first time open Mobile Odin, it will ask to download required flasher file. 3.Open Mobile odin - select open file 4.Point to ROM file you have copied 5.It will fill up all available field automatically 6.select Ever root option and check mark 'Inject SuperSU' And Then Flash.
Device will reboot in special recovery and firmware will be flashed After finishing flashing device will be reboot normally and you will have SuperSU installed and flash counter will remain untouched too. Use Mobile odin to flash flashable zip file You can use mobile odin to flash flashable zip too -Copy flashable zip to SD card (Int/Ext) -Open mobile odin and select OTA/ update ZIP -Point to zip file you have copied -Flash. Stock Recovery/Kernel/Modem from XXDMG1_INU (india) 18th July13 Extract it, you will get individual.tar files for (boot)Kernel,Recovery and Modem. Install required with PC/Mobile Odin. On pc odin, For kernel and recovery use pda tab while for modem use phone tab. For mobile odin, there is separate table for each. Stock Recovery/Kernel/Modem from XXDMC3_INU (india) 15th April13 Extract it, you will get individual.tar files for (boot)Kernel,Recovery and Modem.
Install required with PC/Mobile Odin. On pc odin, For kernel and recovery use pda tab while for modem use phone tab. For mobile odin, there is separate table for each.
Stock Recovery/Kernel/Modem from XXDMC3_XEO 9th April13 Extract it, you will get individual.tar files for Kernel,Recovery and Modem. Install required with PC/Mobile Odin. On pc odin, For kernel and recovery use pda tab while for modem use phone tab.
For mobile odin, there is separate table for each. Stock Recovery from XXDMB6 Download and flash using Odin for PDA tab. Stock Recovery/Kernel/Modem from XXDMB6 19th March13 Extract it, you will get individual.tar files for Kernel,Recovery and Modem. Install required with PC/Mobile Odin. On pc odin, For kernel and recovery use pda tab while for modem use phone tab.
For mobile odin, there is separate table for each. Stock Recovery/Kernel/Bootloader/Modem for latest MB2 Extract it, you will get individual.tar files for bootloader,Kernel,Recovery and Modem. Install required with PC/Mobile Odin. On pc odin, For kernel and recovery use pda tab while for modem use phone tab. For mobile odin, there is separate table for each. Stock Recovery/Kernel/Bootloader/Modem for latest MA6 Extract it, you will get individual.tar files for bootloader,Kernel,Recovery and Modem. Install required with PC/Mobile Odin.
On pc odin, For kernel and recovery use pda tab while for modem use phone tab. For mobile odin, there is separate table for each.
India ROM N7100XXDLL7 N7100ODDDLL2 Kernel [Thnx AdamLange] Modem [Thnx AdamLange]. Keep device ready to wipe anytime - Factory reset on the go. - free service by samsung. Xposed framework and modules user guide for newbies Xposed framework:framework which gives you the possibility to modify your ROM - without modifying any APK Modules: you can enhance functions of ROM without flashing Mods All credits goes to,,,,,,, (kindly help me to update this list) How to use Note you needs device rooted. Download latest Xposed framework 'XposedInstaller.apk' from this post #1 for any query/support regarding framework post 2.Install downloaded apk 3.open installed application and select install/update 4.Reboot device.
Now get your required modules Apk from below mentioned link and install it here is available modules A.: This modules have many functions like call recordin, status bar color, CRT effect, battery waring and more.